Showing posts with label Do it Yourself. Show all posts

Saturday, April 7, 2012

DIY Scrabble Tile Coasters

Hey there, Hive! I know it's been weeks since my last post, but I have a good excuse.

I'm getting married. Like, this week. Hot damn!

While I've been busy crossing things off my list (and checking it twice like Santa) I haven't forgotten about you. Now that things have died done a bit, I'm going to write as many posts as possible before the big day. More Warbler, no waiting! Whether you like it or not. I hope you do like it though.

Let me start off by saying, if you're thinking of making Scrabble coasters, ask yourself a few questions first? Do I have a large guest list? Do I lose patience quickly with material things such as glue or cork board? Am I out of wine?!

If you answered test to any of those questions, you might want to reconsider this project.

We set out to make 100 coasters. The first day of the project, Mr. Warbs, MOH J5 and myself only made 23 coasters between the three of us. And it was exhausting. Sorting through the tiles to make four letter words, cutting the cork into 4x4 pieces and gluing the tiles to the cork board was a lot of work. It took us almost an entire month to complete the project. Granted we didn't work on it every day. Between work, other wedding activities and living our lives, we found it hard to set aside the hours necessary to really make a dent in the project.

In the end, we only made 94 coasters which ended up being plenty since we have approximately 45 guests. Mr. Warbs and I got to keep four for ourselves. Hooray!

Hold on to that feeeelin'

Here's what you'll need to get started:

-Scrabble tiles (the total should be based on how many coasters you plan on making and if you're building 4x4 or 5x5 coasters)
-Cork board
-Xacto knife
-Wood glue (we used Elmer's contractor's wood glue)
-Mod podge or some kind of clear water resistant sealant


The first thing we did was separate the tiles into groups of letters to make building words easier. Luckily, I had just made a scouting trip to Ikea and had tea light candle holders to utilize. This actually took up a lot of time.

The best way to start is to lay the words down on the cork board and trace the outline. It's easier if you have a defined area to work within with the glue. We each had a different method for gluing the tiles down. 

MOH J5 glued each tile down one by one. Then he cut the cork board around the tiles.


Same as Mr. Warbs
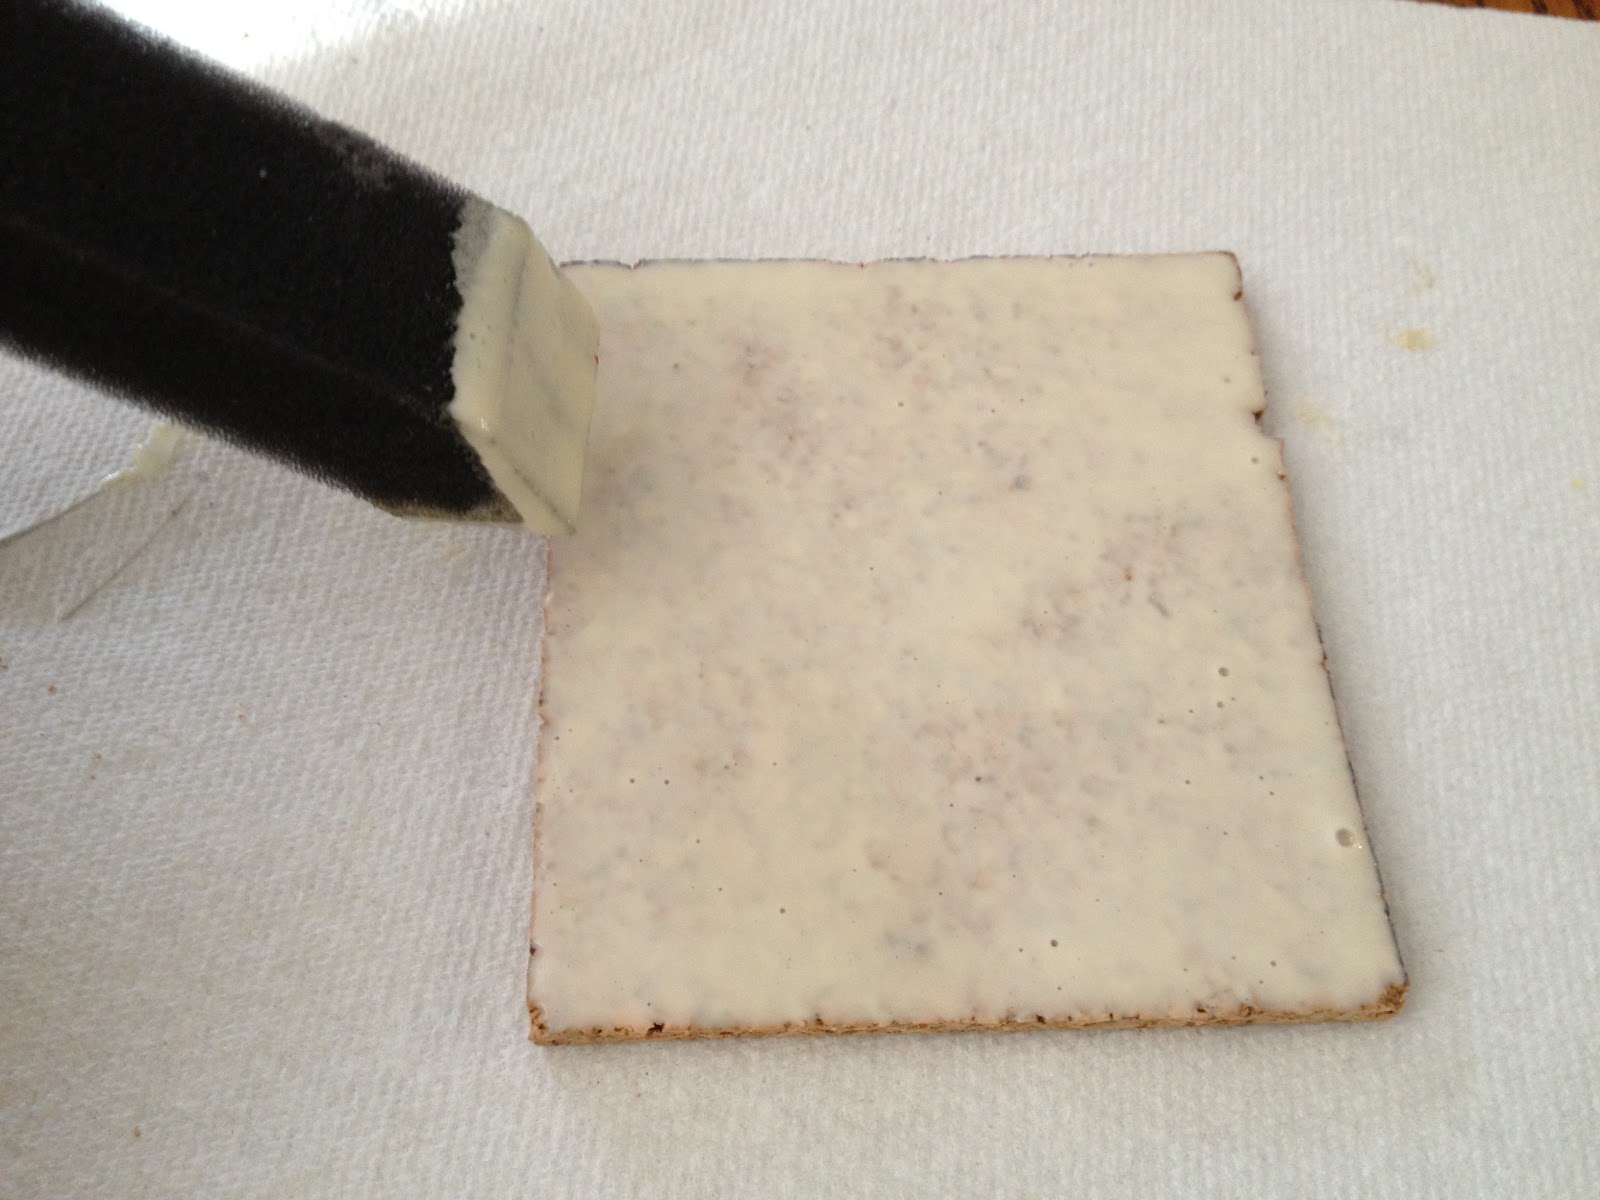

I cut the cork into 4x4 tiles first, then applied the glue all over and placed the tiles down.
I messed up on this one though. This is way too much glue. You want to apply a thin layer...

Like this!

Any Rilo Kiley fans out there?

I would recommend cutting and trimming the coasters on a piece of scrap wood to protect your surfaces. We picked ours up at Michael's on the cheap.

After all of our coasters were made and dry - you know, a month later - we laid them down to coat with the sealant. We followed the directions on the can of sealant and used three coats.

Laid out on random bubble wrap we had lying around.

 Two coasters per guest, folks.


We let the coasters dry for a day and then tied them in bundles using leftover baker's twine from the invitations. Recycle, reduce, reuse! And...that's pretty much it! Honestly, if I had known how time consuming it was at the beginning, I may not have gone through with it. But, I'm happy with the way the coasters turned out so it was worth it in the end. And I was even happier when I was done!


 What was your most time consuming wedding project?

Tuesday, November 8, 2011

DIY Mason Jars

We've booked the venue, photographer, videographer and all the other big details. Now that we have some downtime before the big day, it's time to get started on the DIY projects! Early on I fell in love with the classic look of blue mason jar centerpieces. Perfect for our outdoor wedding. But they're extremely rare and tend to go for about $8 or $10 per jar. A cheap bride's best friend, also known as Google, helped me find an easy way to get the same look for a lot less. Stain the damn things blue with glass paint! If you are a broke bride or are just feeling crafty, here's how I did it.


What you'll need:
-Mason Jars (Purchased at Walmart for $10)
-Vitrea 160 in Turquoise (Purchased at Michael's for about $5. I also got the Indian red color to play around with)
-Vitrea 160 Paint Thinner (Also purchased at Michael's for $5)
-Fan Brush (some people have used sponge brushes, cheese cloth and rags)
-Spoon
-Tupperware (Preferably stain resistant!)

Close up of the paints and thinner

Depending on how many jars you want to stain, you won't need to use a lot of paint. In order to get the transparent look, you need to use more thinner than paint. Since I stained twelve jars, I used a spoonful of paint and three spoonfuls of thinner. I mixed them together in a tuppereware bowl. If you're only staining a couple, I would recommend a pinkie size of paint and three times as much thinner. So basically a ratio of 25% paint, 75% thinner.

I placed my jar in a separate tupperware bowl because I don't like making messes. I also found I could use the excess paint, a plus! I lightly dipped my fan brush into the paint and went over the jars in long strokes from top to bottom. Almost immediately I noticed some streaking, but I don't think that's avoidable. I tried using a rag and got the same results. Just try to brush evenly. Don't fret if you still have lots of streaks! I'll tell you how to fix that later.

My first one was kind of bad. I got better though.

Since red is my all time favorite color and one of my wedding colors, I tried the red paint on a couple of the jars. I didn't like the way they came out though. I don't know if they needed more paint, or what I just didn't like them as much as the blue. Oh well, trial and error.

Meh

The finished pack. I'm trying to hide the red ones in the back there.

The next step was easy. I let the jars dry for a full 24 hours and in the meantime proceeded to read Christopher Pike's latest vampire book. Vampires are never going away people. The next day I placed the jars on a cookie sheet and let them bake in the oven for 40 minutes at 325 degrees. The heat helps set the paint and gets rid of the streaks. If after everything you still notice streaks, I wouldn't worry too much. Once you put flowers and water in the jars, no one will even notice.

Baking jars

I was pretty pleased with how they turned out. Like I said before, the streaks that I did notice were pretty minuscule at this point. After the cooled off, I filled one up with water and arranged a grocery store bouquet. I kind of wish I had thought to buy the actual flowers we're using for the wedding, but I was happy with the way these turned out. This was by far the easiest wedding project I've ever tackled!

Voila! "Vintage" blue mason jars!


*All photos are personal

Friday, July 8, 2011

The One Where I See a Woman About Some Flowers


If, like me, you're resolved to be a DIY bride chances are you get the same weird looks and questions that I do. Mainly frowns and "...but WHY?" I usually just laugh and say "I'd like to be involved in every aspect of my wedding.", or the more truthful "It will be WAY cheaper."

A few weeks ago I told Mother-in-Law Warbler that I was planning on going the DIY flower route via the LA Flower Mart in downtown. She got really excited and asked me about the kind of flowers I wanted to use and how her crafty sister could help out if I wanted. After getting my flower preferences she said, "OK, now we can call up a few florists to get some estimates."

Now it was my turn to frown. "Huh? No...we're getting our flowers from the flower mart...and arranging them ourselves."

She smiled politely and patted my hand. "Oh, I know. But a few phone calls won't hurt."

There's an old saying that goes something like, "Get used to being wrong, because your Mother-in-Law will always be right." You know what? It is so true!

At first I brushed it off and filed it away as part of the "unwanted wedding advice". But the truth is my DIY plans had major holes. The original plan was to buy the flowers the day before the wedding, assemble some helpers to arrange the centerpieces, bouquets and boutonnieres. And cart everything out to the wedding venue that same night before the rehearsal dinner.

Hole #1: Mr. Warbs and I live in Downtown Long Beach. Our wedding venue is in Malibu, an hour away when traffic is playing nice. The LA Flower Mart is in, well Downtown Los Angeles. For readers not familiar with the Southern California set up that's about 63 miles of driving. With boxes full of centerpieces, bouquets, dresses, shoes and other wedding paraphernalia. 

Hole #2: Once we carted all of the flowers out to Malibu, we would need to find a place to store them. If the hotel didn't have a special refrigerator or the venue didn't have any room, we would be in trouble for the night.

 Did I mention how HUGE the flower mart is? It stretches on for miles!

Other than the obvious problems with location and transporting the flowers, I was also starting to realize that I actually had no desire to DO any of that work. Or put my bridal party through it. So a funny thing happened over the Independence Day weekend. I went to see a florist nearby our venue, The Exotic Green Garden. We had e-mailed back and forth before and she was willing to work within my measly budget. And she did. And I BOOKED her! Not only did she work for our budget, she also gave me the name of some local bakers for our grooms cake. Swoon. It was pretty much love at first sight. Tiana asked for examples of the feel I wanted for the wedding. I showed her photos like this:

Image via The Knot / Flowers by Kristin Rockhill of Details of I Do / Photo by John Arcara Photography


And this:

Image via Mrs. Taco / Flowers by Amy Burke Designs / Photo by Ashley Forette and Gem Photo


She really loved this photo
Image via The Knot / Centerpieces by Annie's Garden, Corsicana, TX / Photo by Sara & Rocky Photography, Dallas TX


She immediately told me that with my budget it probably wouldn't be a good idea to model the tables after that last photo, because I would need two centerpieces per table. The first photo of the books was much more doable. Her suggestion to reuse the ceremony flowers for the centerpieces was right up my alley! She also advised me on where I should cut flowers and which flowers I could use to fill things out a bit. In no time she pulled up her past examples to show me what she could do. She pulled up these photos:


Please excuse those colors. Those are NOT our colors.

At the end of the meeting I felt like I was discussing the wedding with a friend instead of a friendly. Tiana really understood what I wanted and didn't try to oversell me. Doing it myself would have been fun, but just didn't seem worth it in my case. I'm so glad I listened to Mother-in-Law Warblers's advice and hired a professional. This is one time where I m happy to have been proven wrong!